> ## Documentation Index
> Fetch the complete documentation index at: https://helpcenter.recotap.com/llms.txt
> Use this file to discover all available pages before exploring further.
# HubSpot Integration
> Set up HubSpot integration to sync account data and drive Recotap segmentation.
## HubSpot Integration
The bi-directional integration with HubSpot allows you to seamlessly import account data into Recotap and export valuable account insights to HubSpot.
## Steps to Integrate **HubSpot** and **Recotap**
1. **Login to Your Recotap Account**:
* Navigate to the **Settings Icon** in the top-right corner of the title bar.
* Go to **Workspace** > **Integrations** from the navigation menu.
The following screen will display all the available CRM tools that can be integrated with Recotap.
2. **Select HubSpot from Available Tools**:
* Click the **Connect** button next to HubSpot in the list of available CRM tools.
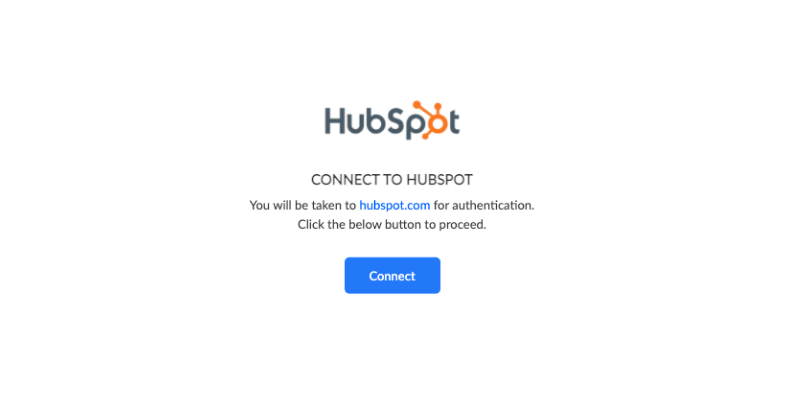
3. **Authenticate Your HubSpot Account**:
* You will be redirected to the HubSpot login page.
* Enter your HubSpot credentials and follow the on-screen prompts to verify your Google login, if required.
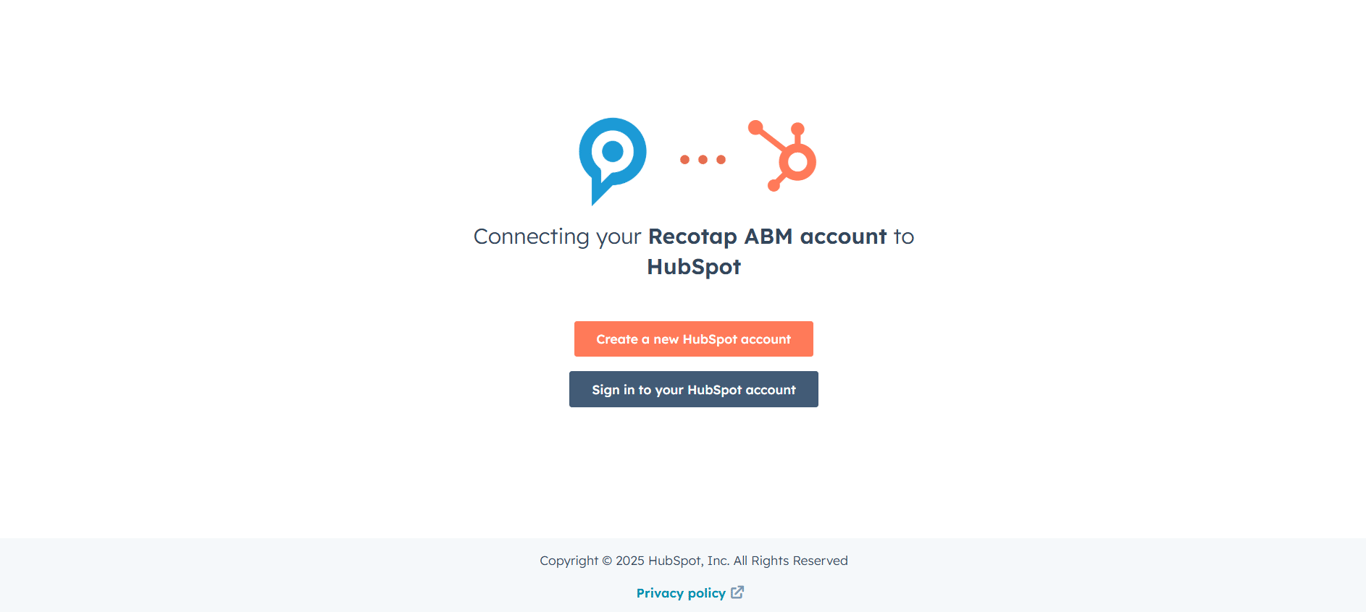
4. **Grant Permissions**:
* Review the requested permissions and click **Connect App** to establish the connection.
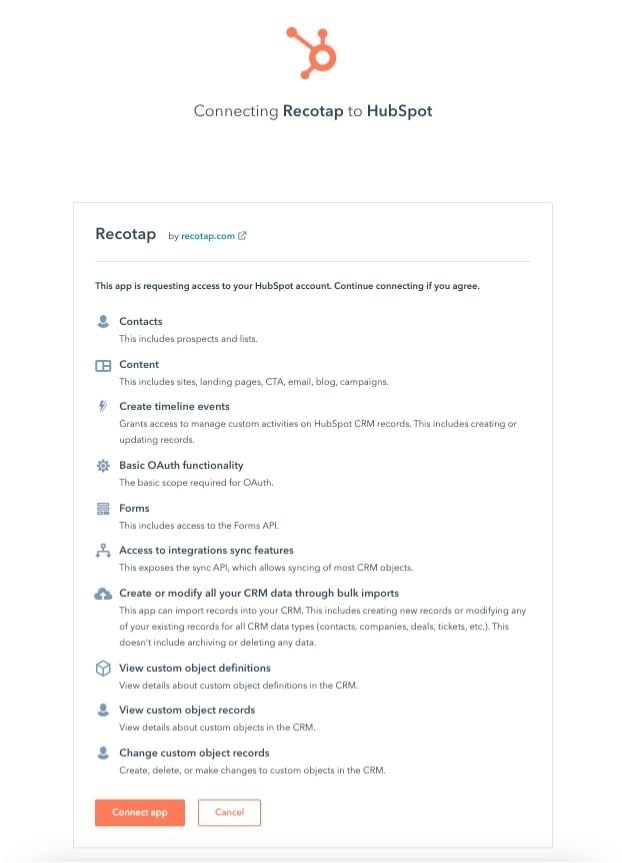 5. **Choose the HubSpot Account**:
* Select the account you wish to connect with Recotap.
5. **Choose the HubSpot Account**:
* Select the account you wish to connect with Recotap.
 6. **Integration Complete**:
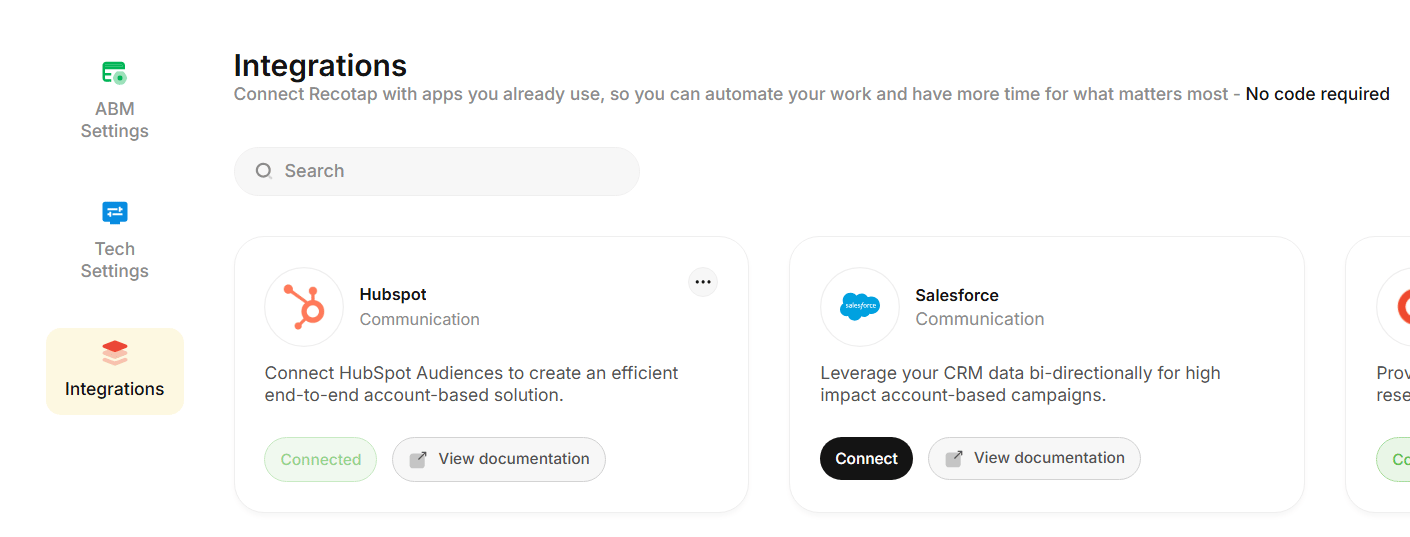
* Once connected, HubSpot will appear as **Connected** in the Integrations section of Recotap.
6. **Integration Complete**:
* Once connected, HubSpot will appear as **Connected** in the Integrations section of Recotap.
 ## **Configuration and Mapping of Properties After HubSpot Integration**
After completing the integration, configure property mapping to ensure seamless data flow between HubSpot and Recotap
### **Steps to Configure Property Mapping:**
1. **Access the Configuration Settings**:
* Navigate to the **Integrations Dashboard** in Recotap.
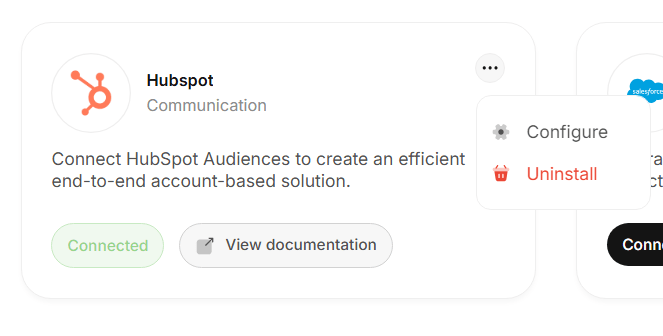
* Click the three-dot menu (…) next to HubSpot and select **Configure**.
## **Configuration and Mapping of Properties After HubSpot Integration**
After completing the integration, configure property mapping to ensure seamless data flow between HubSpot and Recotap
### **Steps to Configure Property Mapping:**
1. **Access the Configuration Settings**:
* Navigate to the **Integrations Dashboard** in Recotap.
* Click the three-dot menu (…) next to HubSpot and select **Configure**.
 2. **Select Fields to Map**:
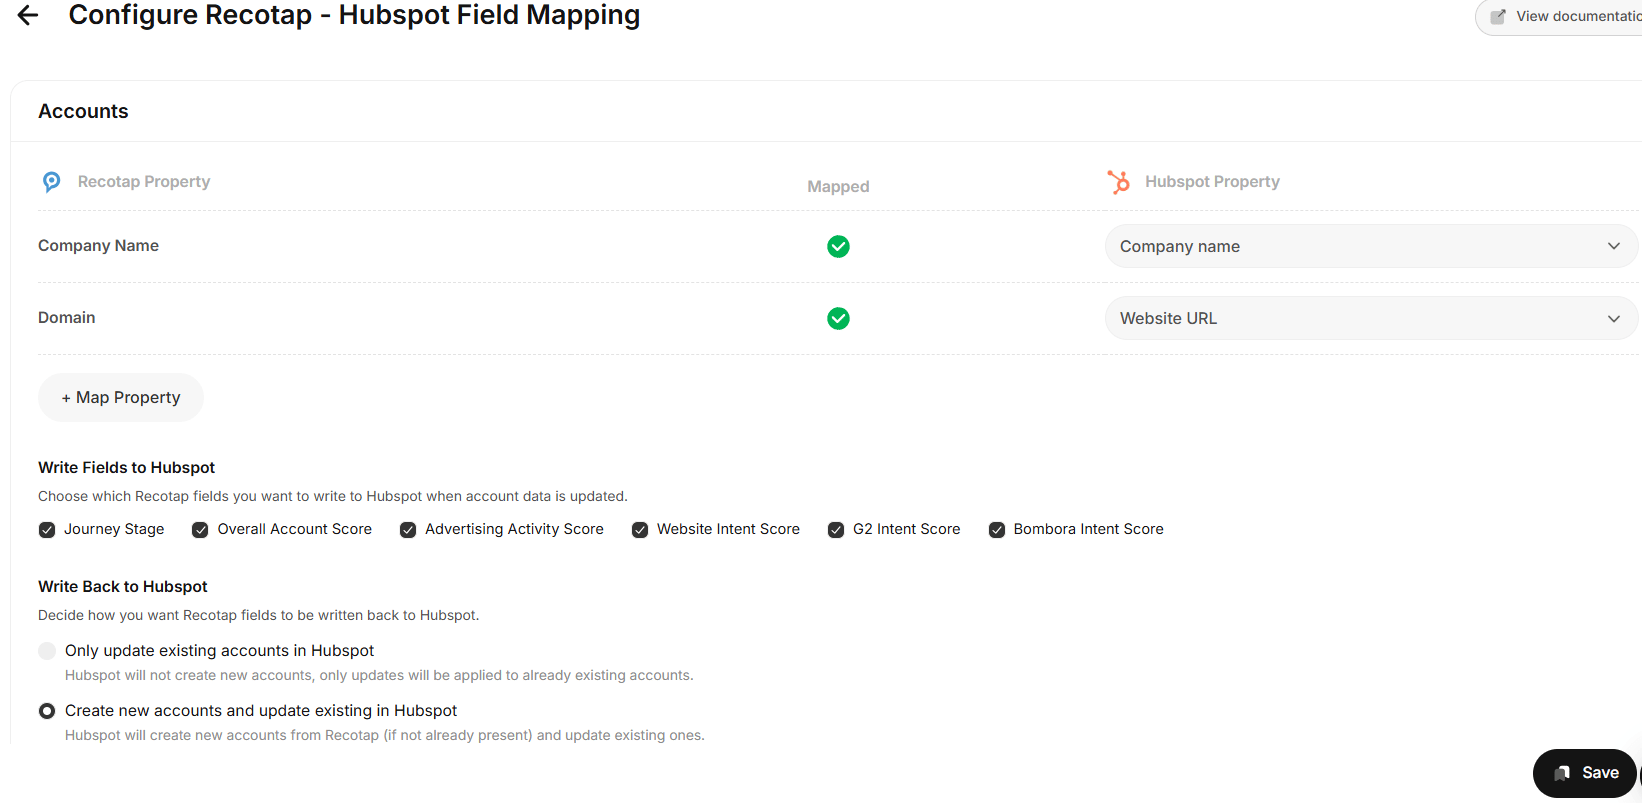
* On the **Field Mapping Screen**, identify the properties to sync.
* Examples of Mapping
* **Recotap Property**: Company Name → **HubSpot Property**: Company Name.
* **Recotap Property**: Domain → **HubSpot Property**: Website URL.
3. **Verify Mapping**:
* A green checkmark under the **Mapped** column confirms the mapping is valid and complete.
4. **Save Configuration**:
* Click **Save** to apply the field mappings.
2. **Select Fields to Map**:
* On the **Field Mapping Screen**, identify the properties to sync.
* Examples of Mapping
* **Recotap Property**: Company Name → **HubSpot Property**: Company Name.
* **Recotap Property**: Domain → **HubSpot Property**: Website URL.
3. **Verify Mapping**:
* A green checkmark under the **Mapped** column confirms the mapping is valid and complete.
4. **Save Configuration**:
* Click **Save** to apply the field mappings.
 ### Advanced Configuration Options
Once your primary field mapping is complete, you can further refine how Recotap communicates with HubSpot by adjusting **write-back preferences** and **data sync behaviour**.
1. **Write Fields to HubSpot**
Choose which Recotap fields you want to push to HubSpot whenever account data is updated.
Commonly mapped fields include:
* **Journey Stage**
* **Overall Account Score**
* **Advertising Activity Score**
* **Website Intent Score**
* **G2 Intent Score**
* **Bombora Intent Score**
> ✅ Tip: Select only the fields relevant to your reporting and workflows to keep HubSpot data focused and clean.
2. **Write Back to HubSpot**
Decide how Recotap should handle account data synchronization with HubSpot:
* **Only update existing accounts in HubSpot**
Updates will apply only to already existing records. No new accounts will be created in HubSpot.
* **Create new accounts and update existing ones** *(Recommended)*
If an account doesn't exist in HubSpot, Recotap will automatically create it. Existing accounts will be updated with the latest data from Recotap.
> 💡 Note: Account and property updates occur automatically every 24 hours.
>
> Any records not synced in the current cycle will automatically be picked up during the **next 24-hour sync**.
### ⚠️ Troubleshooting: Account Creation or Sync Issues
If your accounts are not being created automatically in HubSpot, it's likely due to **mandatory field dependencies** in your CRM.
* **Mandatory Field Restriction:**
Recotap can only auto-create HubSpot accounts using the fields **Account Name** and **Domain**.
If your HubSpot instance requires any **additional mandatory fields** (e.g., *Owner*, *Lifecycle Stage*, *Pipeline*),
Recotap **will not be able to create the account automatically**.
* **How to Resolve:**
1. Temporarily remove the extra mandatory fields in HubSpot for company creation.
2. Allow Recotap to create the account automatically.
3. Reapply your mandatory field rules once the sync is complete.
> 🛠️ Quick Fix:
>
> To check if this is the issue, go to your **HubSpot Settings → Data Management → Properties → Company**, and review which fields are marked as "Required."
### Advanced Configuration Options
Once your primary field mapping is complete, you can further refine how Recotap communicates with HubSpot by adjusting **write-back preferences** and **data sync behaviour**.
1. **Write Fields to HubSpot**
Choose which Recotap fields you want to push to HubSpot whenever account data is updated.
Commonly mapped fields include:
* **Journey Stage**
* **Overall Account Score**
* **Advertising Activity Score**
* **Website Intent Score**
* **G2 Intent Score**
* **Bombora Intent Score**
> ✅ Tip: Select only the fields relevant to your reporting and workflows to keep HubSpot data focused and clean.
2. **Write Back to HubSpot**
Decide how Recotap should handle account data synchronization with HubSpot:
* **Only update existing accounts in HubSpot**
Updates will apply only to already existing records. No new accounts will be created in HubSpot.
* **Create new accounts and update existing ones** *(Recommended)*
If an account doesn't exist in HubSpot, Recotap will automatically create it. Existing accounts will be updated with the latest data from Recotap.
> 💡 Note: Account and property updates occur automatically every 24 hours.
>
> Any records not synced in the current cycle will automatically be picked up during the **next 24-hour sync**.
### ⚠️ Troubleshooting: Account Creation or Sync Issues
If your accounts are not being created automatically in HubSpot, it's likely due to **mandatory field dependencies** in your CRM.
* **Mandatory Field Restriction:**
Recotap can only auto-create HubSpot accounts using the fields **Account Name** and **Domain**.
If your HubSpot instance requires any **additional mandatory fields** (e.g., *Owner*, *Lifecycle Stage*, *Pipeline*),
Recotap **will not be able to create the account automatically**.
* **How to Resolve:**
1. Temporarily remove the extra mandatory fields in HubSpot for company creation.
2. Allow Recotap to create the account automatically.
3. Reapply your mandatory field rules once the sync is complete.
> 🛠️ Quick Fix:
>
> To check if this is the issue, go to your **HubSpot Settings → Data Management → Properties → Company**, and review which fields are marked as "Required."