> ## Documentation Index
> Fetch the complete documentation index at: https://helpcenter.recotap.com/llms.txt
> Use this file to discover all available pages before exploring further.
# Zoho CRM Integration
The bi-directional integration with Zoho CRM allows you to bring account data from Zoho CRM into Recotap and write Recotap account insights back to Zoho CRM.
This helps keep account information synchronized while making Recotap signals such as journey stage, account scores, and intent data available inside your CRM.
## Steps to Integrate Zoho CRM and Recotap
### Open Integrations in Recotap
* Log in to your Recotap account.
* Click the Settings icon in the top-right corner.
* Navigate to Workspace → Integrations.
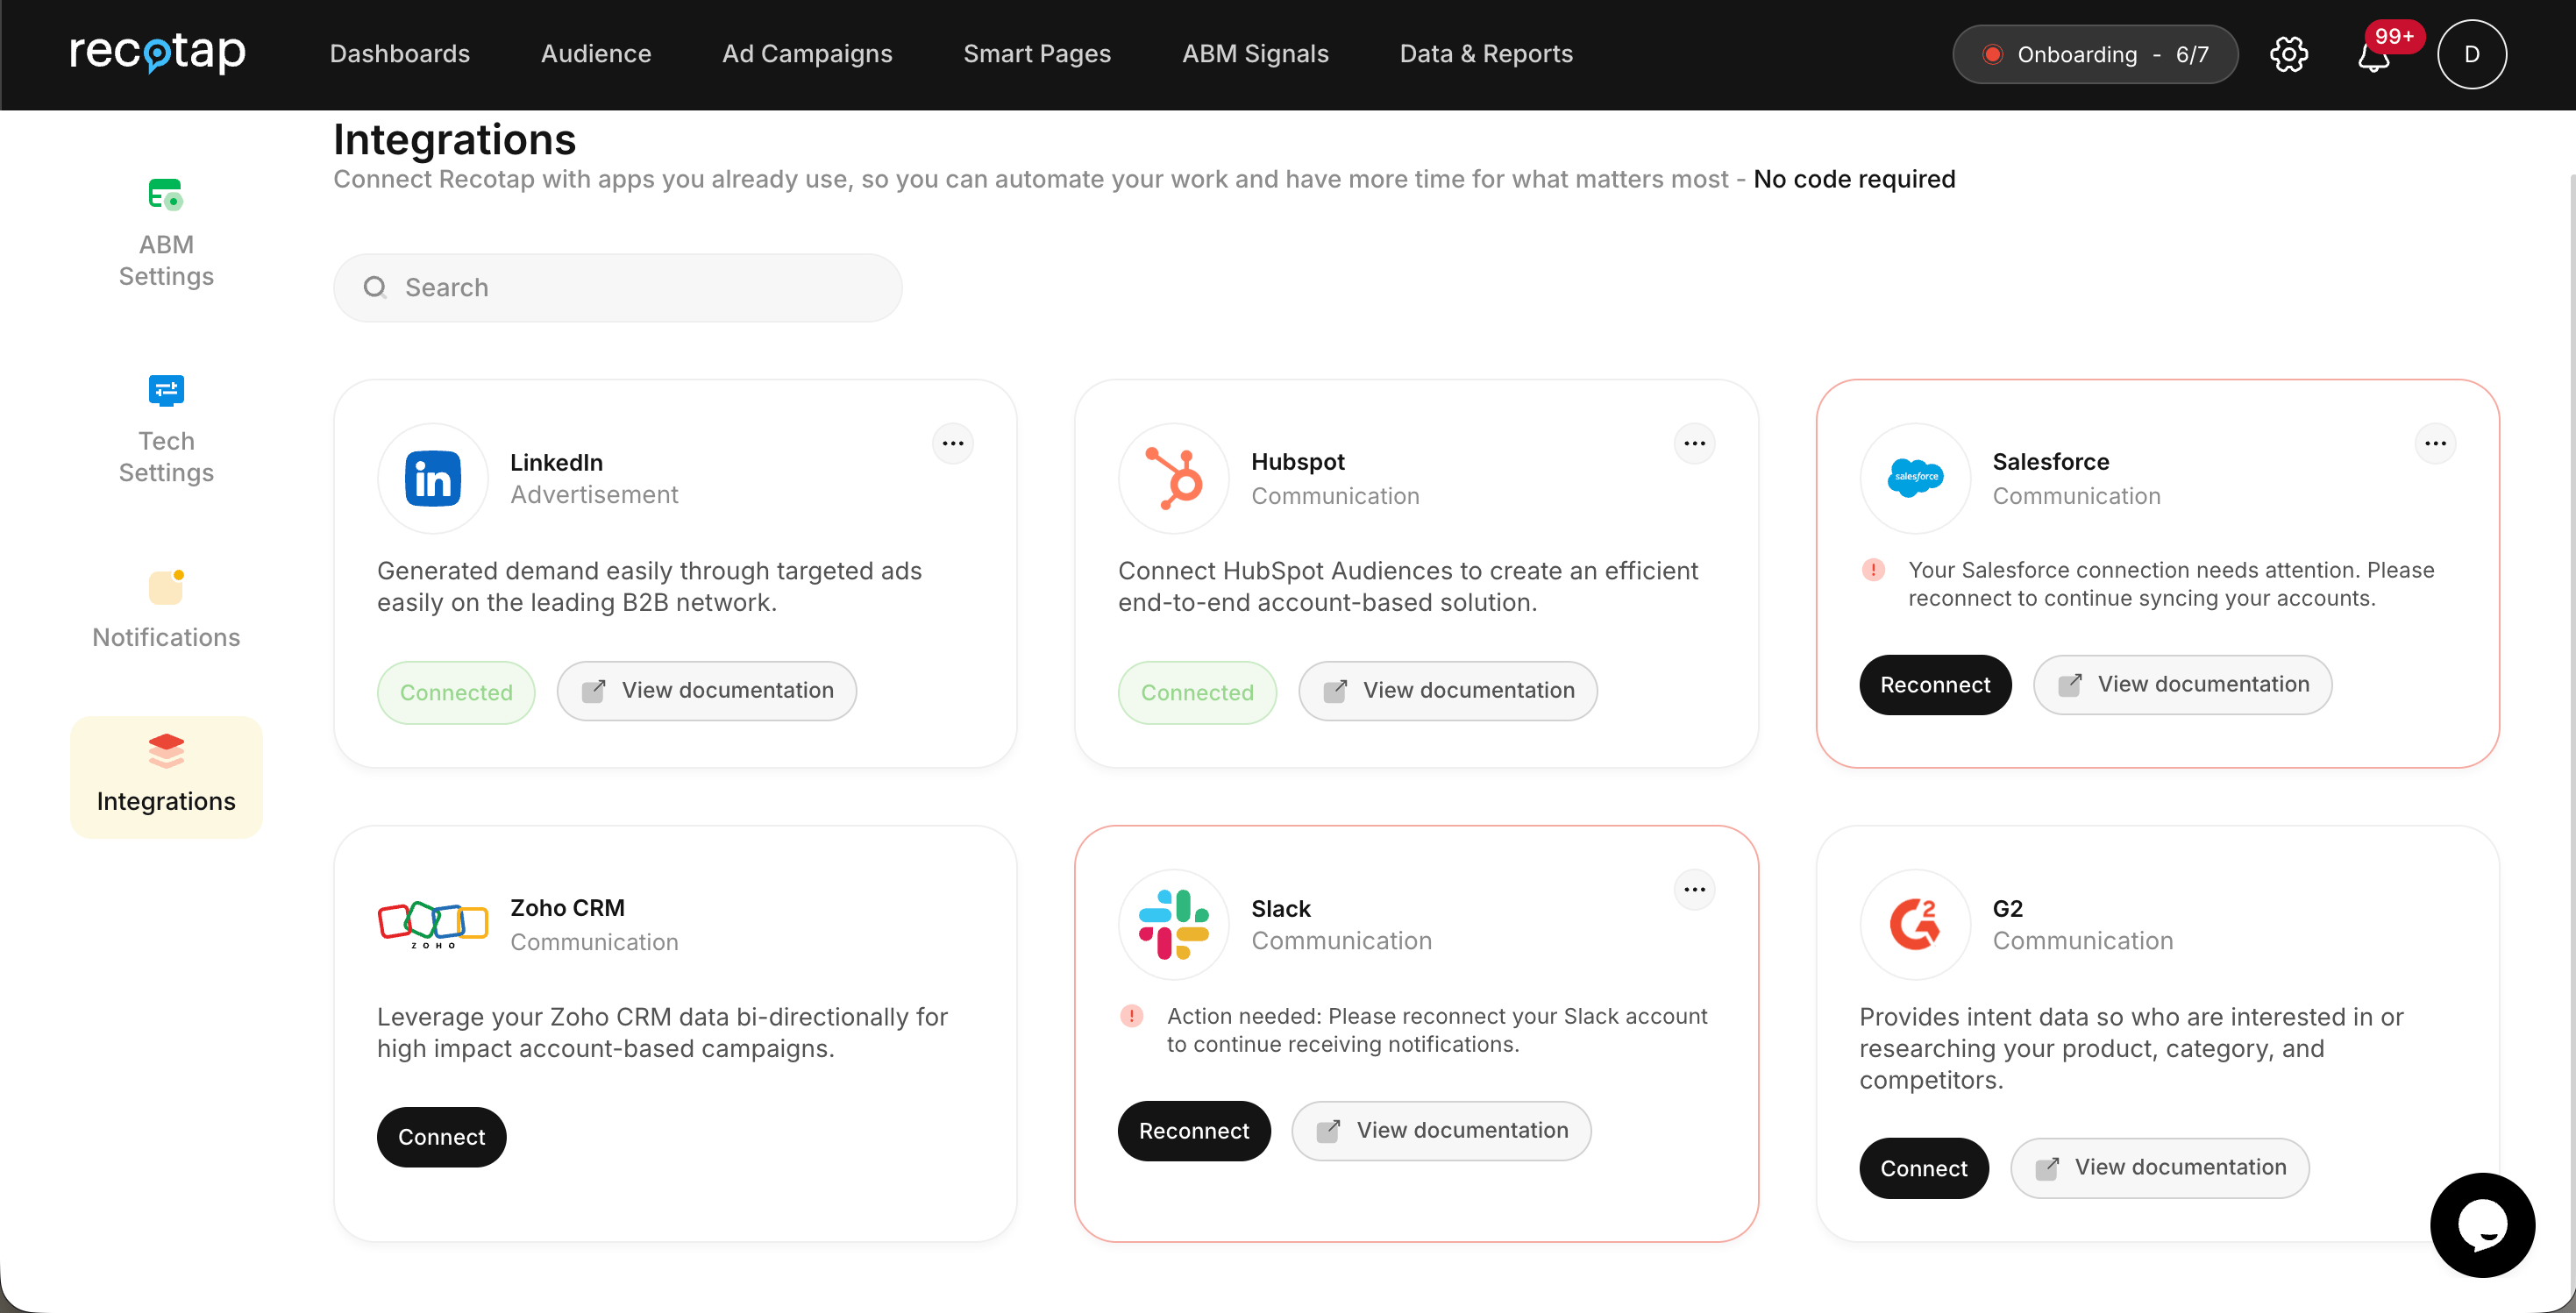
* The Integrations page displays all applications currently available to connect with Recotap.
 ### Connect Zoho CRM
Locate **Zoho CRM** and click **Connect**.
You will be redirected to Zoho to authorize Recotap to access the required CRM information.
### Authorize Recotap in Zoho
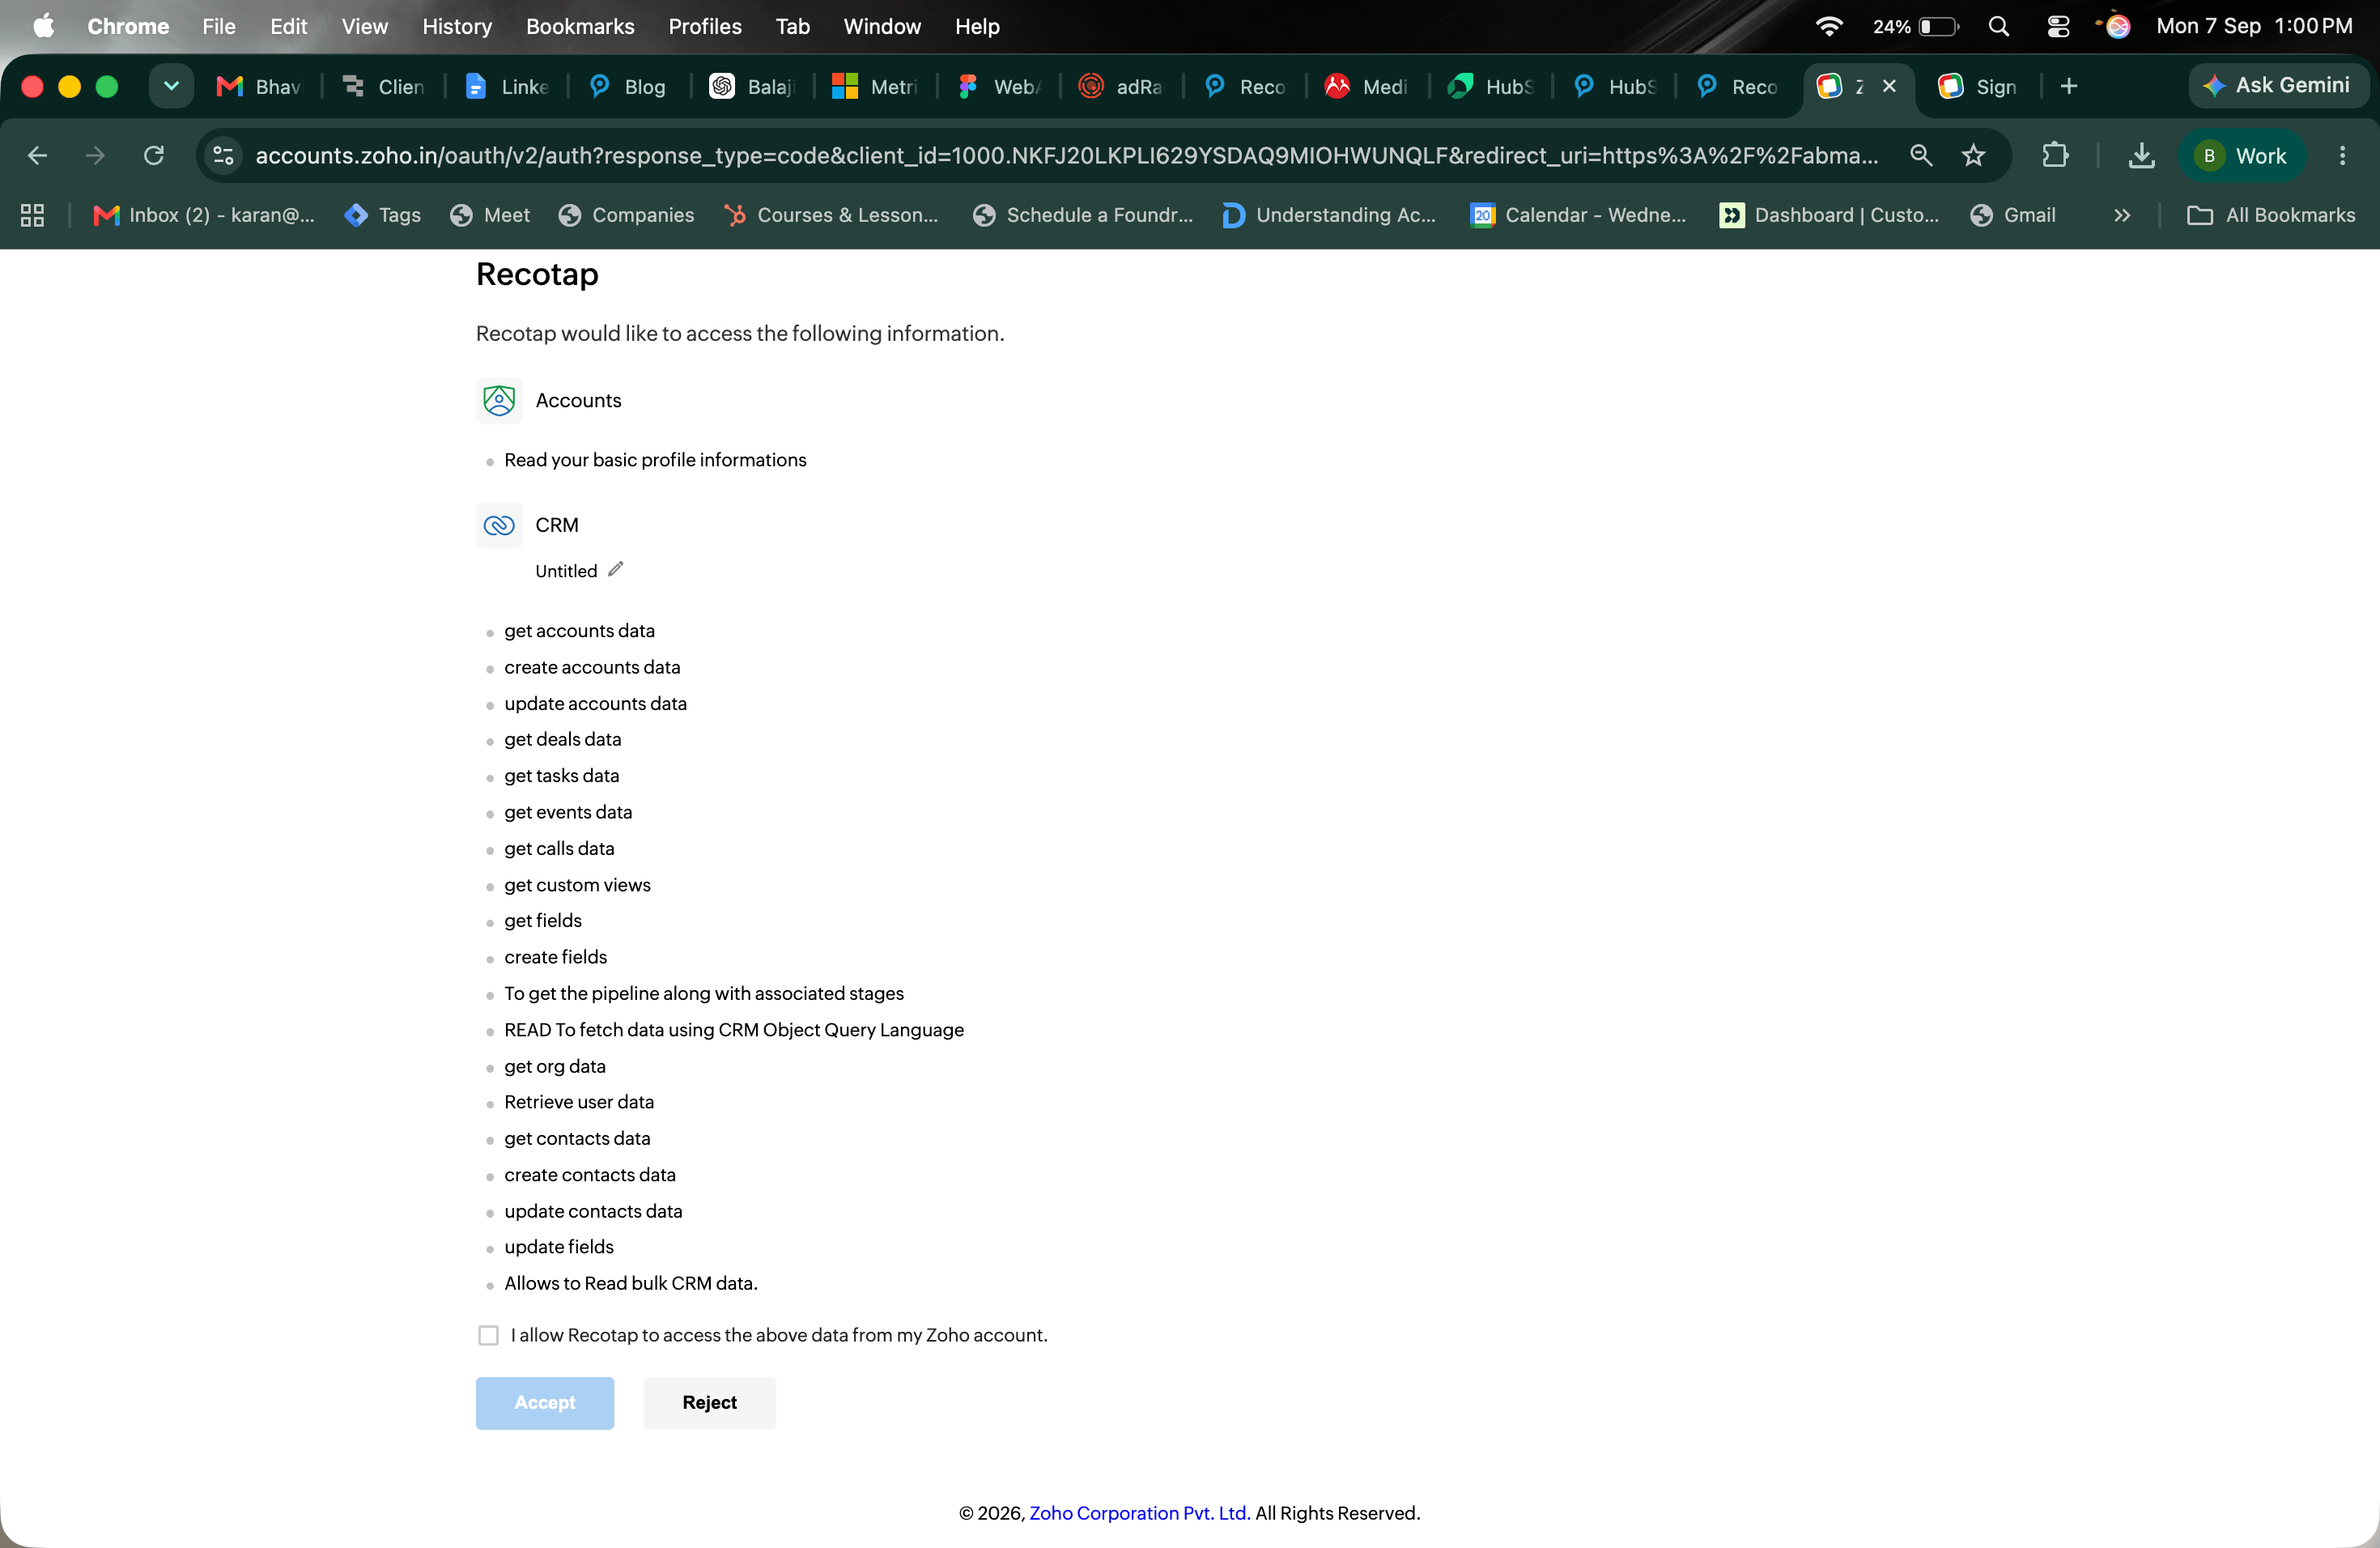
Review the permissions requested by Recotap.
The authorization screen displays the Zoho CRM data that Recotap requires access to for account synchronization and field mapping.
Select:
“I allow Recotap to access the above data from my Zoho account.”
Then click Accept.
### Connect Zoho CRM
Locate **Zoho CRM** and click **Connect**.
You will be redirected to Zoho to authorize Recotap to access the required CRM information.
### Authorize Recotap in Zoho
Review the permissions requested by Recotap.
The authorization screen displays the Zoho CRM data that Recotap requires access to for account synchronization and field mapping.
Select:
“I allow Recotap to access the above data from my Zoho account.”
Then click Accept.
 Note: The permissions are required for Recotap to read CRM data and write supported Recotap data back to Zoho CRM.
### Integration Complete
After authorization is completed successfully, you will be redirected back to Recotap.
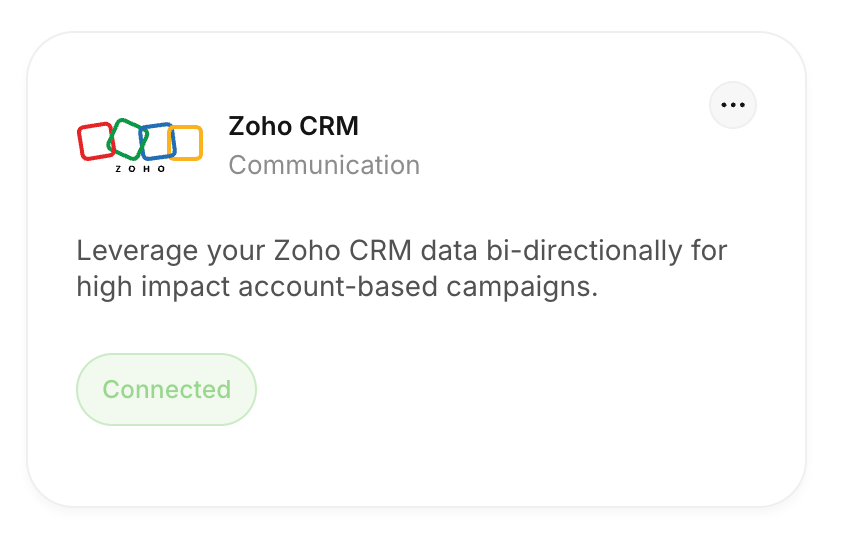
The Zoho CRM integration card will display the status:
**Connected**
Note: The permissions are required for Recotap to read CRM data and write supported Recotap data back to Zoho CRM.
### Integration Complete
After authorization is completed successfully, you will be redirected back to Recotap.
The Zoho CRM integration card will display the status:
**Connected**
 # Configuration and Mapping of Properties After Zoho CRM Integration
After connecting Zoho CRM, configure the property mapping to determine how account information should be synchronized between Zoho CRM and Recotap.
## Steps to Configure Property Mapping
### Open Zoho CRM Configuration
From the **Integrations** page:
* Locate Zoho CRM.
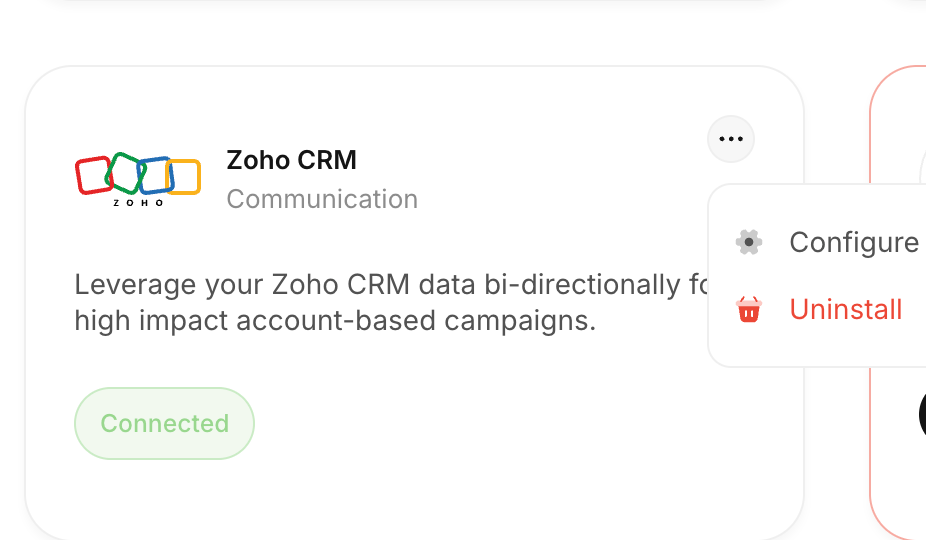
* Click the three-dot menu (…).
* Select Configure.
You can also use the same menu to uninstall the integration if required.
# Configuration and Mapping of Properties After Zoho CRM Integration
After connecting Zoho CRM, configure the property mapping to determine how account information should be synchronized between Zoho CRM and Recotap.
## Steps to Configure Property Mapping
### Open Zoho CRM Configuration
From the **Integrations** page:
* Locate Zoho CRM.
* Click the three-dot menu (…).
* Select Configure.
You can also use the same menu to uninstall the integration if required.
 ### Map Account Properties
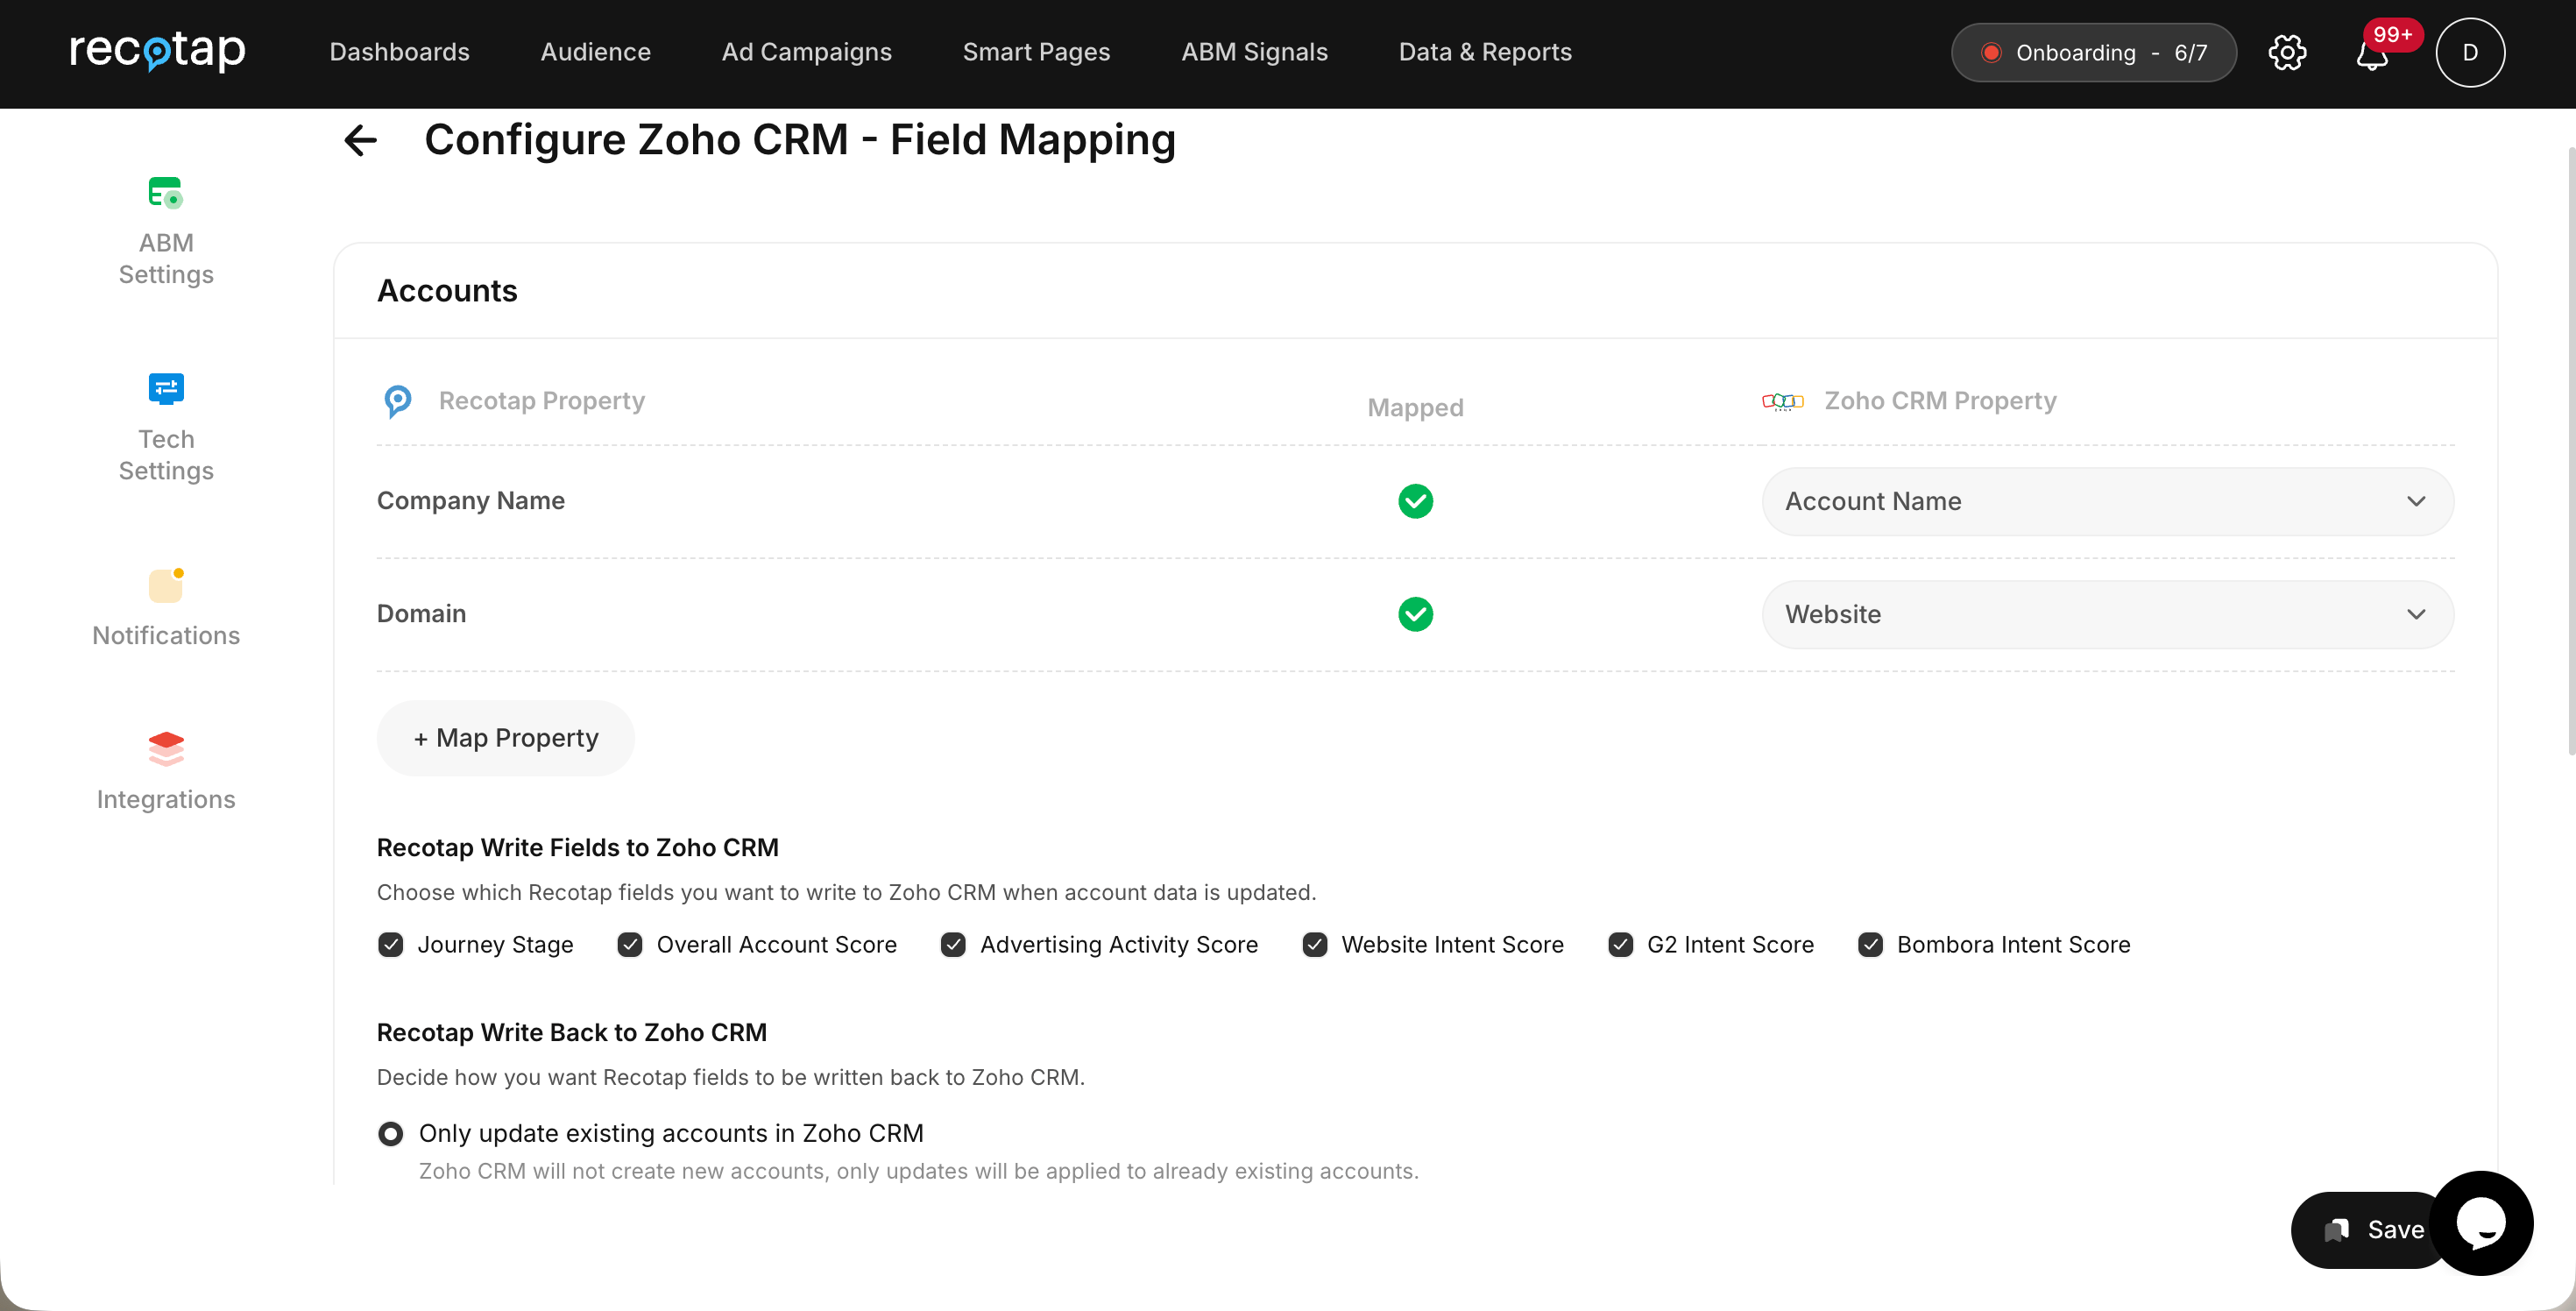
The **Configure Zoho CRM** – **Field Mapping** screen allows you to map Recotap account properties with the corresponding properties in Zoho CRM.
The default mappings include:
| Recotap Property | Zoho CRM Property |
| ---------------- | ----------------- |
| Company Name | Account Name |
| Domain | Website |
A **green checkmark** under the **Mapped** column confirms that the property has been mapped successfully.
To map additional properties, click **+ Map Property** and select the required Recotap and Zoho CRM fields.
### Map Account Properties
The **Configure Zoho CRM** – **Field Mapping** screen allows you to map Recotap account properties with the corresponding properties in Zoho CRM.
The default mappings include:
| Recotap Property | Zoho CRM Property |
| ---------------- | ----------------- |
| Company Name | Account Name |
| Domain | Website |
A **green checkmark** under the **Mapped** column confirms that the property has been mapped successfully.
To map additional properties, click **+ Map Property** and select the required Recotap and Zoho CRM fields.
 ## Advanced Configuration Options
Once the primary account properties are mapped, you can configure which Recotap insights should be written back to Zoho CRM.
### Recotap Write Fields to Zoho CRM
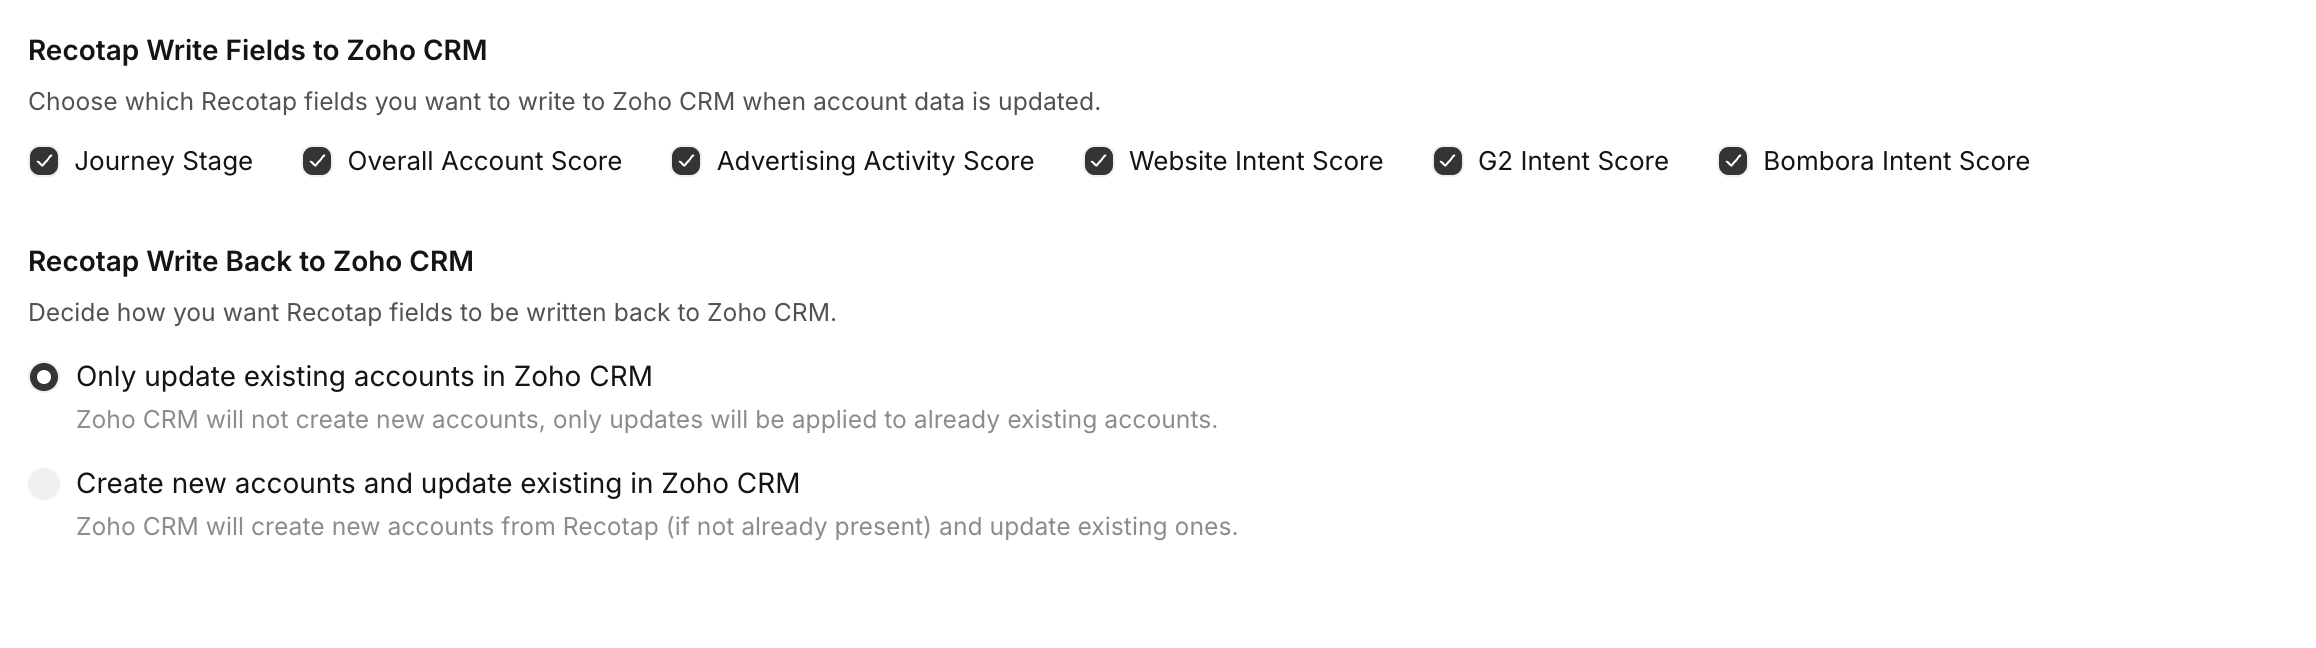
Choose which Recotap fields should be written to Zoho CRM when account information is synchronized.
Currently available fields shown in the configuration include:
* **Journey Stage**
* **Overall Account Score**
* **Advertising Activity Score**
* **Website Intent Score**
* **G2 Intent Score**
* **Bombora Intent Score**
Select only the fields you want Recotap to maintain in Zoho CRM.
Tip: Enable only the fields that are relevant to your CRM reporting, segmentation, automation, or sales workflows.
### Recotap Write Back to Zoho CRM
Configure how Recotap should update account information in Zoho CRM.
**Only update existing accounts in Zoho CRM**
When this option is selected, Recotap updates accounts that already exist in Zoho CRM.
**New accounts will not be created in Zoho CRM through this configuration.**
This option is useful when Zoho CRM should remain the system responsible for creating new account records while Recotap only enriches or updates existing accounts.
## Advanced Configuration Options
Once the primary account properties are mapped, you can configure which Recotap insights should be written back to Zoho CRM.
### Recotap Write Fields to Zoho CRM
Choose which Recotap fields should be written to Zoho CRM when account information is synchronized.
Currently available fields shown in the configuration include:
* **Journey Stage**
* **Overall Account Score**
* **Advertising Activity Score**
* **Website Intent Score**
* **G2 Intent Score**
* **Bombora Intent Score**
Select only the fields you want Recotap to maintain in Zoho CRM.
Tip: Enable only the fields that are relevant to your CRM reporting, segmentation, automation, or sales workflows.
### Recotap Write Back to Zoho CRM
Configure how Recotap should update account information in Zoho CRM.
**Only update existing accounts in Zoho CRM**
When this option is selected, Recotap updates accounts that already exist in Zoho CRM.
**New accounts will not be created in Zoho CRM through this configuration.**
This option is useful when Zoho CRM should remain the system responsible for creating new account records while Recotap only enriches or updates existing accounts.
 ### Save the Configuration
Once the mappings and write-back settings have been configured:
* **Review the selected properties.**
* **Confirm that the required mappings show the green Mapped indicator.**
* **Click Save.**
Your Zoho CRM integration is now configured for account synchronization.
### Save the Configuration
Once the mappings and write-back settings have been configured:
* **Review the selected properties.**
* **Confirm that the required mappings show the green Mapped indicator.**
* **Click Save.**
Your Zoho CRM integration is now configured for account synchronization.